Next you must clone another copy of the same image. With the image selected, click Edit>Copy.
 A copy of your original image will appear in the top left of your work area. The duplicate will be selected. Next click 'Image>Flip/Rotate. In the box that appears be sure to select 'Flip horizontal', then click 'OK'.
 The copied image is now mirrored. Next select the original image, making sure that 'Transparent' mode is active, and drag it towards the mirrored image. Carefully line up the images so that they touch symmetrically at the hinge area. Because the images are touching they will be 'welded' when you convert to SVG.
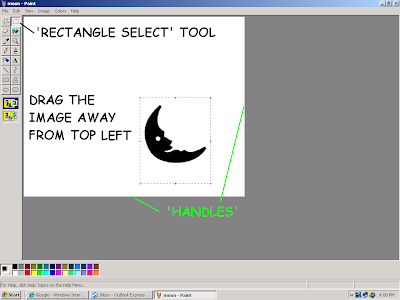
 The resulting 'welded' image should appear something like this:
 Now crop the image using the little handles (to remove all that excess white area) and save it. You can now convert it to SVG in Inkscape. Ours looked like this:
 Our finished card looked like this:
GOOD LUCK AND HAPPY CUTTING!!


very cool, looks easy I think I'll try it and report back. thanks for posting.
ReplyDeletejackieb