Mar 28, 2009

THEY'RE STICK PEOPLE

Hello all. We're sorry to interupt the "Separating Colors" post but this is screaming to get done. Marla (Hi, Marla!) created some stick people on Facebook and asked me to convert them so she could cut them in vinyl to put on her van, which I did. She liked them so much that she wanted to share them, but the stick people created with that program are copyrighted. There has been some interest in stick people over at the YAHOO SCAL Group so lets get stick people to anyone who wants some. First you have to open Paint, then make a circular shape for a head, then draw........ Of course we're only kidding, but the point is anyone can draw stick figures and they are very easy to convert in Inkscape . You can use almost any graphics program there is and you should end up with exactly the stick person you want. We drew ours using a graphics tablet that we got from TIGER DIRECT for 50 bucks. You will even get a good figure using the mouse.
icon stick person who joined YAHOO! Groups

Personalize your figure with skis, scissors, golf clubs or whatever. If you can't convert them to SVGs send them to us. Maybe we should put up a page just to show what everybodies' stick person looks like. Let us know in the comments section or by email

GOOD LUCK AND HAPPY CUTTING!!

Mar 23, 2009

FIRST STEP TO THE 'SEPARATING COLORS' PROBLEM

Hello again everyone. There has been a lot of interest on separating the colors of an image over at the SURE CUTS A LOT group on YAHOO . Over the next few posts, I'll show you one way to do this using a free program called Paint.net. This is a super piece of software that rivals ADOBE PHOTO SHOP in features. I have found that Paint.net is easy to use and a very powerful program. When we are finished all the parts of this lesson you should be able to determine if an image is suitable for cutting and be able to make an SVG of each color. For this lesson we will use the image of a military badge that we recently converted for a member of YAHOO Groups. This image is a good place to start because it is very sharp and has excellent contrast. To download Paint.net click on the button. To get the image that we will convert, right click the image and save it (remember where you saved it).


Get Paint.NET!


So go ahead and install Paint.net and save the image. In the next post we will start to manipulate the image and break out the colors so that each color can be converted to an SVG for cutting. Remember to send us any good SVGs that you would like to share; we'll add them to the library. Until then:
GOOD LUCK AND HAPPY CUTTING!

Mar 13, 2009

USING MICROSOFT PAINT TO MAKE WELDED IMAGES

A very useful resource for Windows users has been right there all the time - Microsoft Paint. It is included with Windows and is very easy to use. I find that welding letters in Paint is easier than doing it in SURE CUTS A LOT. For this post we'll make the phrase "ST.PAT" with welded letters but shapes use exactly the same technique. I am using a free font called MERLIN because it is stylish, cuts nicely, is easy to weld (because of the shape of the letters), and has a Celtic feel to it.
To start, open Paint and make your background a size that's easy to work with by clicking "Image" then selecting "Attributes". 4" X 3" is a good size so just type the values in the appropriate boxes. Make sure to select the proper units, then click OK. It's best to have a big background area so you'll have plenty of room to move the letters around. Now select the text tool (the box with the "A"). Drag a square a little bigger than the size of one letter. A text select box will appear so you can pick the font and size you want. When you have selected the font and size, type a capital "S". At this point, make sure that you have the 'transparent' background selected. There are 2 boxes with colored shapes inside; 'transparent' is the bottom one. Now make another text box in a different area of your image and type in a capital "T". Continue making text boxes and typing your letters until you have all the characters needed to make your image.
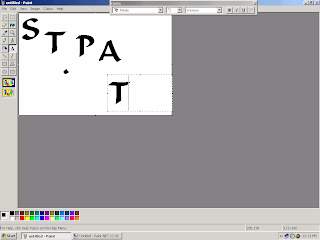

Using the "Rectangle Select" tool (the dotted line rectangle next to the star) drag a box around your capital "S" and drag the letter to the top left part of your image. Then drag a box around a "T" and drag it so the cross of the "T" is touching the top of the "S". The "S" is now welded to the "T". Continue with the other letters until your ST.PAT image is the way you want it.
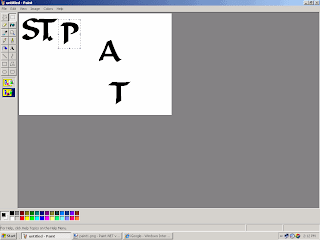


Finally, using the "Rectangle Select" tool, drag a box around the finished text and drag the entire text image to the upper-left corner. Crop the image so the completed image fills the back ground using the handles (dots halfway along the right side and bottom of the background - you will get a 2-headed arrow when you're on the handle). The finished image can now be saved.
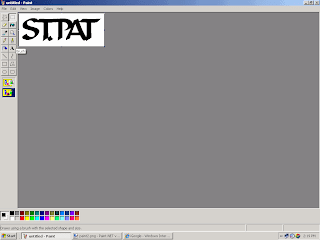

After your imaged has been saved, you can open it with INKSCAPE and convert it to an SVG file as discussed in the previous post.

GOOD LUCK AND HAPPY CUTTING!!